When my friends went to Seoul last March, I asked them to buy me Brownie Cookies from Petite France. These are one of my favorite cookies, because brownie and cookie in one! I intended to pay for these cookies, but my friends insisted on giving them for free. Being the shy person that I am, I couldn't just let them do that, so I decided to make them some simple crochet stuff in return.
 |
| The prize. |
They both like Adventure Time, and good thing I had the yarn colors I needed for Finn and Jake, so I looked for some easy Adventure Time crochet patterns. I found a couple of mini amigurumis, but I thought maybe I should give them something they can use. I can't make them phone cases because I don't know what sizes their phones are, and I thought coasters would be too simple. Then I remembered the mini square basket I made from before to put our coins in, so I decided on doing that, and then just improvise for the Finn and Jake details.
Somehow some part of me regrets this, and tells me I should have gone with the coaster. Because I had less than a day's notice of our rendezvous and I wanted to impress my friends with my new-found crochet skills, I crocheted AF to finish these in a few hours.
Without further ado! The pattern. (This is the first pattern I've ever written, so please bear with me :) )
 |
| Algebraic! Finn and Jake mini baskets. |
Materials:
Hook: 4 mm crochet hook
Yarns:
Red Heart White high bulk acrylic
Red Heart Light Blue high bulk acrylic
Creme de la Creme Dark Linen
Some black yarn
I based and used the basket pattern
here and just adjusted the size and switched colors for Finn.
Finn Pattern:
Yield is approximately 3 inches on one side. I did Finn's face first so I'll know the basket size I need to make for the face to fit.
Finn's Face
I just made a simple oval shape I learned from doing a cat applique before. I really can't remember how I did this, but here's a great tutorial on
how to make an oval shape.
You can use felt for the face details, but I didn't have any so I just sewed in the eyes and mouth with some black yarn.
Basket Base
Using the light blue yarn, Ch 12.
Crochet hdc in 3rd ch from hook. Continue hdc for the rest of the 9 ch (10 sts).
*Ch 2, turn, hdc 10 times* repeat 7 times
Crochet around the sides: *ch1, sc 10 times* repeat 4 times for all sides
Crochet 1 extra sc to get to the corner. Ch 2.
Basket sides
Row 1: *sc 10 in BLO (back loop only), in the corner sc 2 in the same space* repeat 4 times for all sides. Sl st on top of the starting ch 2.
Row 2: Ch 2, hdc in all stitches in both loops. Sl st on the ch 2 at the beginning of this row.
Row 3: Ch 1, sc in BLO. Sl st on top of the starting ch.
Row 4: repeat row 2
Row 5: repeat row 3
Switch to white, and fasten off the light blue yarn.
Row 6 - 13: repeat rows 2 and 3, alternating. Or you can continue doing this until your desired basket height.
 |
| Face off! |
Attaching Finn's face to the basket
I was supposed to use the light brown yarn to attach Finn's face, but I forgot to bring it to the office so I just used the white yarn. I recommend using light brown for this, because using the white yarn will result to some light brown showing on the sides.
You can sew the face to the basket using a tapestry needle, which I think will be easier, but I wasn't in my right mind or I just don't have a needle, so I did the more difficult way.
Position Finn's face on one side of the basket. Start at any side of Finn's face. Sl st through the basket and BLO of Finn's face, all around. Fasten off.
The instructions for this is not very clear (I know!), but I learned this technique when I was doing baby sandals before. Here's the
video tutorial for slip stitching together.
 |
| Finn! |
Jake Pattern:
The pattern is similar to Finn's, only this time I made it smaller because I wanted them to be nested. Yield is approximately 2 inches on one side. Again, I did the face details first to gauge the basket size I need.
Jake's face
Like Finn, you can also use felt which will be easier, but I didn't have felt so I crocheted the details too. You can make your own if you have a faster / easier / preferred way, but I'm just gonna put mine here.
Eyes (make 2): Using white yarn, ch 4, sl st in the first ch to make a ring. Sc 5 in the ring, sl st in to the first sc.
Switch to black yarn. Sc 2 times in each st, sl st in the first sc to finish. Fasten off.
Nose: Make an oval shape using black yarn. Ch 3, hdc in the 2nd ch from the hook, sc in the last st, fasten off.
Snout: Using yellow yarn, ch 8 (or until the whole thing can wrap the nose on one side, you know, how Jake's snout and nose looks like). Sc into the 2nd ch from the hook, continue sc until the last st. Fasten off. Note: slightly tighten the stitches, so that it will curl a bit.
Basket Base
Using the yellow yarn, Ch 8.
Crochet hdc in 3rd ch from hook. Continue hdc for the rest of the 5 ch (6 sts).
*Ch 2, turn, hdc 6 times* repeat 3 times
Crochet around the sides: *ch1, sc 6 times* repeat 4 times for all sides
Crochet 1 extra sc to get to the corner. Ch 2.
Basket sides
Row 1: *sc 6 in BLO (back loop only), in the corner sc 2 in the same space* repeat 4 times for all sides. Sl st on top of the starting ch 2.
Row 2: Ch 2, hdc in all stitches in both loops. Sl st on the ch 2 at the beginning of this row.
Row 3: Ch 1, sc in BLO. Sl st on top of the starting ch.
Continue repeating rows 2 and 3, alternating, until your desired basket height. I based the height on Finn's height, and for Jake's face details to fit.
 |
| So many pieces! @__@ |
Attaching Jake's face
This was the hardest part of doing these baskets. I spent the most time stitching the details than crocheting the baskets themselves. :( I would recommend using a tapestry needle, because these details are so small and very difficult to keep in place.
Position Jake's nose on one side of the basket. Sew it in. Next, position Jake's snout to curl around the nose. I did the same technique I used sewing in Finn's face, but sewing only on one side of the snout.
Last, sew in Jake's eyes near the snout. Then you're done :)
 |
| Duuuuude. |
Final products:
 |
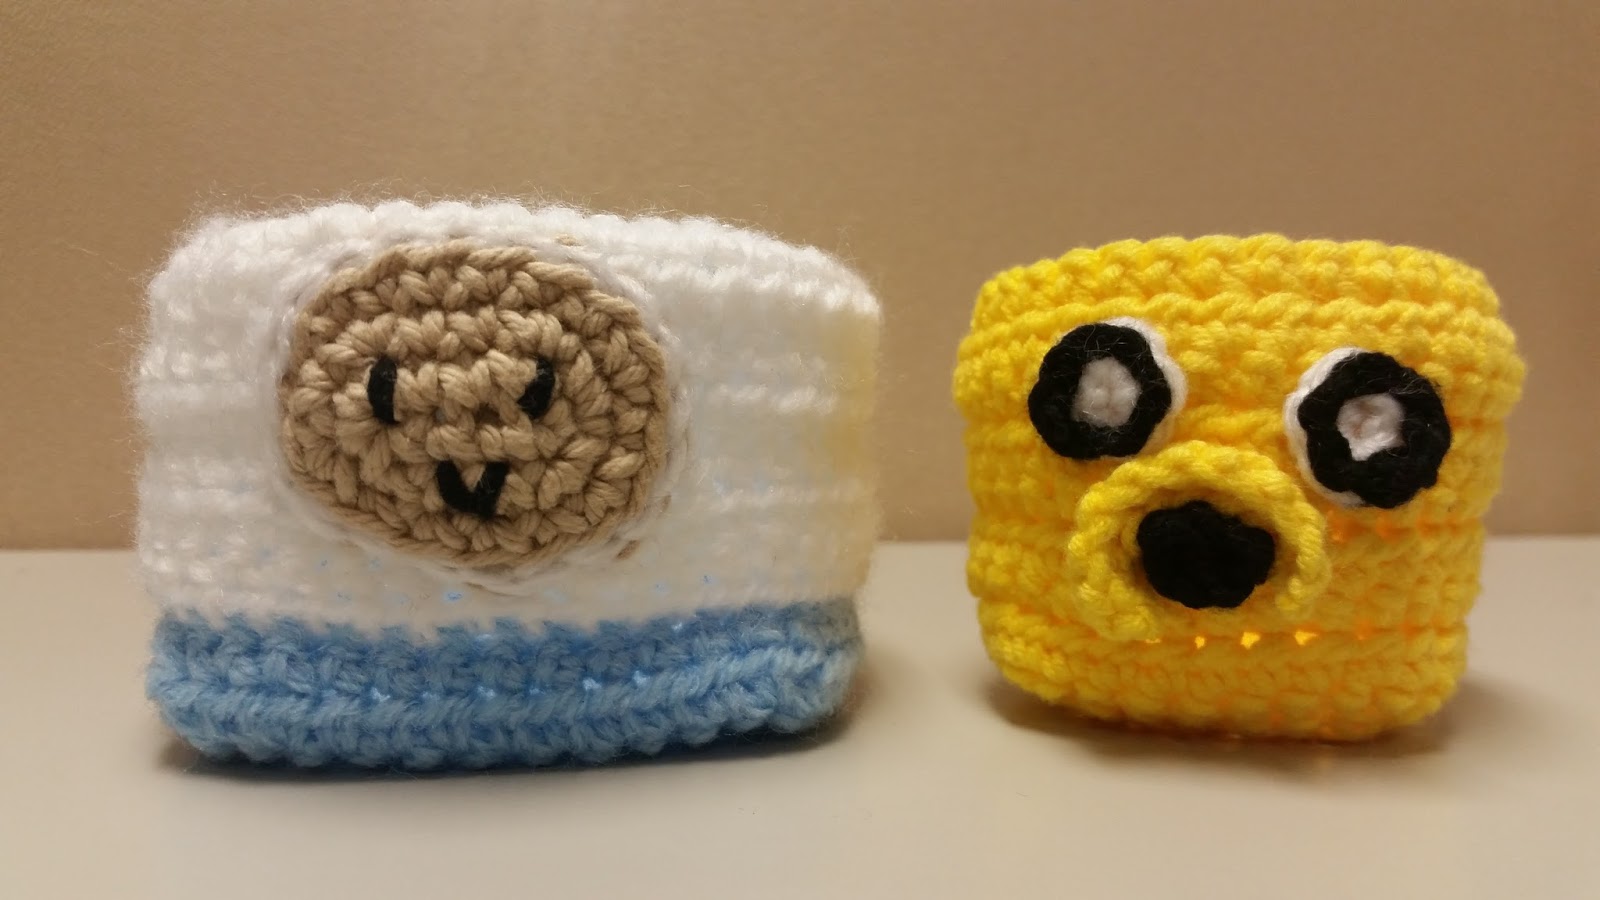
| Mathematical! |
 |
| Nested Finn and Jake |
My baskets are not very square, most likely because of the yarn types I used. But I still like how they turned out. As you can see, Jake's eyes are not symmetric because as I've said, I had a difficult time sewing them in. Also, Finn's face had some brown peeping on the sides because I did not use the brown yarn for sewing (bad Raine!).
Final recommendations:
- Use felt for easier face details.
- If you don't have felt, use the same light brown yarn to sew in Finn's face. Also, use tapestry needle (or any needle that can hold your yarn) and sew Finn's face and especially Jake's like a normal person would.
- Use a lighter shade of brown for Finn. And more mustard-y yellow color for Jake.
I enjoyed doing these so much, I'm planning on doing Marceline and LSP versions once I get the colors for them. And I'm also thinking of doing other Adventure Time projects. :)
If you have any questions or corrections, please feel free to share in the comments below, I'll be glad to answer and respond. After all, homies help homies, right? :)
Enjoy crocheting AF! \m/
This pattern is free and not for sale. Please credit and link back to this site when sharing, using for business, etc. Thanks! :)